Fayetteville Swamp Dogs 6/29/10

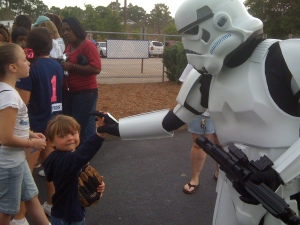
Just got home from Fayetteville. Myself and a few other members of the 501st were asked to troop J.P. Riddle Stadium in Fayetteville, NC for a baseball game they were having. We got there, suited up, and started trooping. We got to see lots of kids and take lots of pictures before the game. Vader (Bill Lane) was asked to throw the opening pitch, but unfortunately it started raining pretty heavily and the game was called off. We all got a little damp but overall it was still a good troop. All of us were able to go out to dinner together and had a nice time.

Here’s a pic from the event:

More to be seen here.

ConCarolinas 2010

This past weekend I was lucky enough to attend ConCarolinas in Charlotte, NC. I wasn’t entirely sure what to expect going into it since it was my first con. It turned out to be great. I got to meet lots of new people from the 501st that I hadn’t yet had the privilege to meet, as well as see those that I had met. I would have to say the highlights for me were getting to meet Albin Johnson (the guy who started it all!), participating in the droid hunt, and inducting artist Scott Rorie as an honorary member of the 501st. Albin was a really awesome guy to talk to and hang out with. It was really interesting hearing his views on costuming and some of the stories he had to tell. As far as the droid hunt goes, the 501st organized a little game/raffle for the “con-goers” to play with us. We confiscated “droids” (they were really badges worn by people at the con) in exchange for a raffle ticket. The kids had lots of fun with it as well as the adults. Anyway, here’s a pic of me at the con taken by one of the members of the Mandalorian Mercs:

More pics from the con can be found here.

Ft. Bragg Star Wars Day 5-8-10

So I’m a little late (a lot late actually) on posting this but in my attempt to keep this blog up to date I figured now’s as good a time as any. On May 8th, a group of us from the 501st went to the fairgrounds at Ft. Bragg to troop for their annual Star Wars day. This was my first troop! I had a blast. The kids loved it, the adults loved it, a great time was had by all. Hopefully this marks the first in a long line of troops to come. Speaking of which, I will be attending ConCarolinas this weekend so I’ll post pics and other related stuff on that as it comes along. Anyway here is a pic of the group at the fair at Ft. Bragg:

More pics can be found at the Carolina Garrison’s facebook page here.

Voice Amp

So you’ve got your armor all together, you’ve sunk hundreds of dollars into it. What’s the next logical step? Spend more money! All joking aside, there are quite a few options when it comes to sound systems and voice amps for your armor, some fairly inexpensive and some very expensive. Today we’ll talk about the voice amp that I currently use. It’s a very simple relatively inexpensive setup, but it gets the job done. I would like to first of all thank TK-0896 for donating the amplifier unit to me. However because of this I unfortunately I’m not sure of the exact model amplifier unit that I have. I believe it is one of models sold at RadioShack. The amplifier is gutted and hot glued onto the inside of the chest piece. I also fabricated a battery compartment out of plastic left over from the build.

Here’s a pic of the unit:

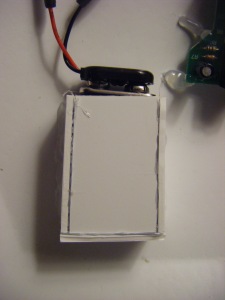
I find that the hot glue is really effective in creating a secure hold for the amplifier system. The battery compartment is made out of 4 pieces of the same plastic as the kit. I took some spare pieces lined them up against the appropriate battery sides and trimmed them to size. Here is a close up of the battery compartment:

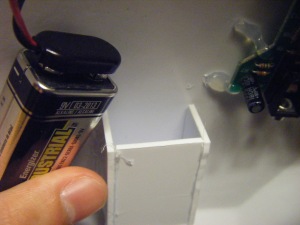
And shot from the top, showing the empty compartment:

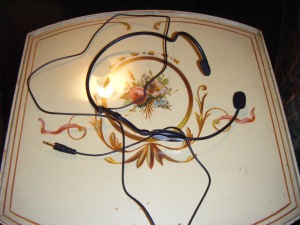
The headset, on the other hand, I can say more about because I purchased it myself. I believe it was about $25 from RadioShack. It’s a simple design, behind the head boom mic. Slim enough to wear inside the bucket. Here’s a pic:

Here’s a close up of the markings on it which read RadioShack 33-3012:

The mic also comes with some accessories, a battery powered On/Off switch, a strap which goes over the head (which I can’t find anymore), and a 1/8 inch to 1/4 inch adapter (neither of which I use while trooping). Nevertheless, here’s a pic of the extras:

I hear these mics are notoriously hard to find in local stores. I’d have to admit when I got mine it was the only one in stock. I’ll provide a link to the one I have. May save you the time of searching around for one. http://www.radioshack.com/product/index.jsp?productId=2102926#

That’s basically it. The mic plugs into the 1/8 inch input on the amp and when you talk it’s over-driven a bit so you do tend to sound like an actual Stormtrooper. Of course there are more expensive solutions that provide voice changing technology, static bursts at the end of conversation, and the ability to play mp3’s. Either way, a voice amp of any kind is a nice touch to any suit of armor.

Make a cheap bucket display stand

Once you’ve made your awesome looking bucket wouldn’t you want to display it proudly? Well I did, but I wanted to be able to do it easily and cheaply. In this post I’ll show you what I did for around $10 and it only took about 10 mins. The materials you are going to need are a styrofoam sphere, cone, circle, toothpicks, glue, and black spray paint (or any color for that matter). All of which can be bought cheaply at various places (I got mine at Michael’s).

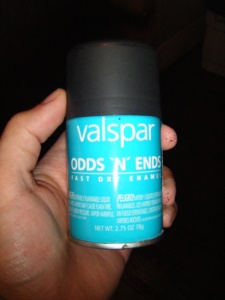
The paint I used is a mini can of valspar multi-purpose paint. Here’s a pic:

The glue I used was called “StyroGlue”. I’ve never used it before but it said it was specifically for styrofoam and it worked out great so I’d recommend it. Here’s a pic of the label if you are interested:

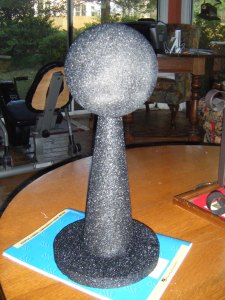
Ok so I need to apologize that I didn’t take any pics of the stand in progress. I just have some finished shots but I’ll explain what I did. The sphere and the circle don’t need any work at all. I cut about an inch and a half off of the top of the cone to shorten the stand and create a bigger base for the sphere to sit on. You are going to want to stick toothpics (however many you think is necessary for a sturdy hold) in the bottom of the cone and the bottom of the sphere. Apply glue to one side of the circle piece (this will be your base) and stick the cone in it (via the toothpicks). This will give the structure more strength while the glue dries. Then apply glue to the top of the cone and stick the sphere on top. Paint the whole structure, wait for it to dry, and voila you’re done! Here’s a finished pic of mine (sorry the flash makes the paint look bad):

And a pic as it sits by my desk:

Strap System

In order to make the armor wearable there are a number of elastic straps, suspenders, and a belt which keeps all the pieces on the body. In order to easily explain the strapping system I’ll attempt to kill two birds with one stone by showing you how to “dress like a stormtrooper” which will hopefully clarify how the strap system works.

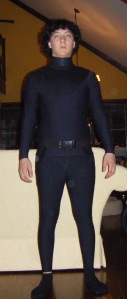
The first step is to put on your “soft parts”. I am referring to the black under-suit which shows through the gaps in the armor. Personally, I prefer two piece black Under Armor (pictured here). Although I have seen people use things varying from wetsuits to tights. It really is a matter of personal preference.

It’s also good to note that the logos that are on the Under Armor are white. Wearing a neckseal will cover them up. However, before I got my neckseal I simply used a black sharpie to color the logos. Check out the “Links” page for a link to TK-409’s website where he sells a great neckseal among other things. Here’s a pic of the front logo (hard to tell from the flash but it’s colored with a black sharpie):

Ok, here is where we get into how my strap system works. It’s a hodge-podge of ideas taken from many helpful people in the 501st. So a big thank you to everybody that helped me out along the way. Next I put on my neckseal (from tk409.com) and the belt which holds up the thigh pieces. It may be hard to tell but there are two pieces of velcro which hang down from the belt on either side. These are what the thigh pieces attach to.

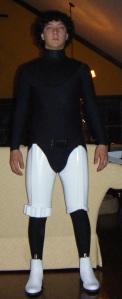
You are going to want to put on the thighs and then the boots next. The reason being is that the calves will go over the top of your boots and if you put on armor above the waist first it will be extremely hard to bend over to put on the lower pieces. Pic of thighs attached and boots on:

Next comes calves. You may be able to see in the previous picture but I have a square piece of “hook” velcro on the front of each boot. The corresponding piece is on the inside of each calf. This keeps the calves from rotating around when trooping. Pic of the calves attached:

Next piece to put on is the midsection. This actually consists of three pieces that I have attached together. The lower back and butt piece are attached at four points by velcro. The “loop” piece is attached to the armor directly while the “hook” piece spans the gap between them. Leave the backing on and it works great to hold them together. Also note in this picture (may be hard to see) two white strips of velcro toward the top of the lower back piece. This is where the suspenders (that hold up the front ab piece) attach in the back. Here’s a pic:

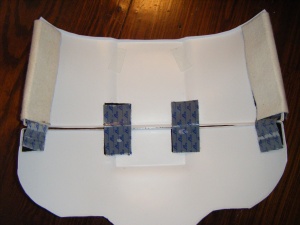
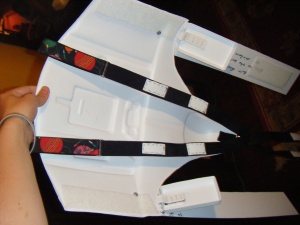
To connect the back piece to the front ab piece I cut two pieces of white vinyl and put velcro on them. This attaches to the front piece on the left and right side and since it is white, prevents the black under-suit from showing through the armor. There is also a black elastic strap which goes between the legs from the butt piece and velcros in the front to the cod piece. Here’s a pic of the inside of the vinyl:

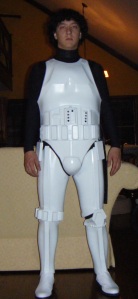
Here is a pic of the front ab piece, lower back piece, and butt piece on. This picture shows where the suspenders (excuse the Christmas theme. They were the cheapest ones I could find with black where I needed them)  are clipped to the top of the ab piece and go over the shoulders to hold up both the front and the back pieces (note the white velcro pieces sewn on to the suspenders near the shoulders):

And a closer pic of the suspenders clipped onto the front piece showing the sewn on velcro pieces:

Next I put on the chest and upper back pieces. The way these pieces are attached is two fold. I have velcro on both the inside and the outside. The inside pieces velcro directly to the suspenders, while the velcro on the outside attaches to the visible shoulder straps. There are also two black elastic strips which velcro under the arms and keep the chest and upper back pieces from moving about too much. Here is a pic of the inside of the upper back piece showing the velcro (note that the chest piece is done the same way):

And the velcro on the outer side:

This pic shows the black elastic straps which attach under the arms (note the staple to strengthen the bond of the velcro to the strap):

Here is a pic with the chest and upper back piece attached to the suspenders only:

Next is the shoulder and bicep pieces. The visible shoulder straps, bells, and bicep pieces are all attached via a single strap which goes from the top of the shoulder down to the bicep. All three pieces are attached to the strap via velcro and the plastic shoulder strap piece is attached at the front and back with velcro to the chest and upper back piece. There is also a black elastic strap attached to the shoulder bell that goes around the bicep to prevent the bells from flaring out. Here is a pic of all three pieces to help clarify:

And a better picture of the elastic strap which holds up the bicep:

Here is the shoulder strap, bells, and biceps attached:

Next put on the gloves, forearms, and hand pieces. In that order. Pretty straight forward, here’s a pic:

And finally, the bucket. Now you’re officially a stormtrooper!

Assembly

Ok, first of all I want to apologize for getting lazy on this blog. I haven’t updated in over a month and in that time I actually finished assembling my armor and attended my first troop (more on that to come later). So, since I got lazy I didn’t take as many pictures as I would have liked to. In place of some of the build pictures I took pictures of some pieces after they were finished so I will do my best to explain what was done.

Trimming is the biggest job of the whole build in my opinion. Since I have already posted on the techniques I used to trim I won’t go into that anymore. Once you have all the pieces trimmed, the next step is to glue all the pieces that need to be glued. Biceps, forearms, and thighs are done exactly the same so I’ll just explain one. Shins are done very similarly but with one difference which I will explain.

The following pictures are of the biceps but like I said the forearms and thighs are done exactly the same.

The two pieces are “clamshelled” together with a finishing strip on the outer side. The finishing strips are 15mm thick.

In order to cut the finishing strips I made two templates out of paper:

The 7mm template is for trimming either side of the bicep pieces to make sure the finishing strip fits evenly over the entire joint. This may have to be altered depending on the circumference of your arms. Here is a pic of two of the cut finishing strips:

Here is a pic of the inner joint:

And here is a pic of the whole bicep glued and clamped showing the finishing strip on the outer joint:

Now the shins are done the same way on the front side (“clamshelled” with a finishing strip on the outer joint). On the backside I simply have velcro to secure the seam which allows the shin piece to open and let the foot slip through. If both sides are glued it may be difficult to get your foot all the way through. Remember to put the hook side of the velcro facing away from your body to prevent any snagging on your undersuit.

The left shin, and right thigh have extra pieces on them. (sniper knee on the shin and ammo packs on the thigh) These pieces are attached on either side with a pop rivet.

Here is a pic of the left shin showing the rivet on the sniper knee:

And a pic of the right thigh showing the rivet:

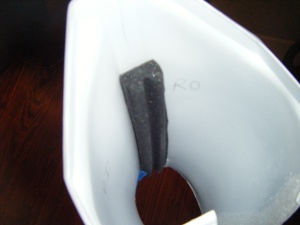
I also decided to add a piece of weather stripping on the inside of each shin piece. This foam keeps the thigh from moving around too much while walking and give it an overall better fit.

Here is a pic of the inside of the right shin showing the weather stripping:
Another piece that needs to be glued is the thermal detonator control plate. The thermal detonator assembly is very straight forward. The body is a 2″ diameter conduit pipe. The plate is glued to the front and the two end caps are put on either end. My end caps were tight enough that I didn’t actually put any glue on those pieces. Here is a pic of the front of the thermal detonator:

The detonator is attached to the belt with two clips that hang over the top of the belt. For my clips I cut two strips of an old license plate and bent them to shape. There are better ways to do this such as using aluminum strips or money clips, however this was the easiest way for me and they don’t really show at all so I’m ok with it for now.

Here is a picture of the back of the detonator showing the clips:

The clips are attached to the detonator using four pop rivets. Line up the clips, drill holes through both the clips and the detonator body and then rivet. Simple as that.

Here is a pic showing the rivets:

The ab buttons on the ab piece need to be glued as well (sandtroopers don’t need these pieces so they aren’t molded into the ab piece).

Here is a picture of the ab piece without the ab buttons glued:
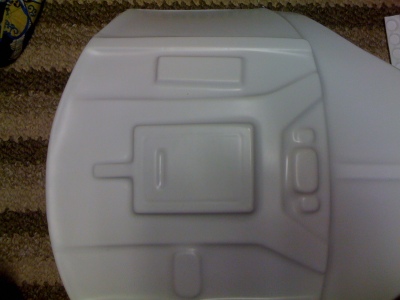
And a picture of the ab buttons glued. (note the four left ab buttons are not glued in this picture):

Here is a picture of the ab buttons painted. (Note the belt is attached in this picture):

The belt is attached with a single bolt on both the left and right sides and the covered with the square button covers that are included in the kit. To fasten the belt around the body I cut two 3″ thick pieces of plastic and attached them at the same bolt. The plastic is flexible enough to wrap around the body and secure in the back with velcro.

Here is a pic showing the point at which the belt is attached:
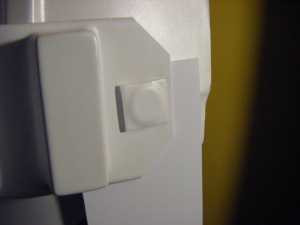
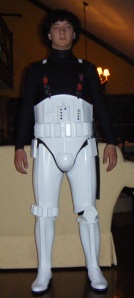
Once it’s all finished you should have something like this:

Stay tuned, more posts to come this weekend :)

Trimming

The first step in assembling your armor is to trim the various pieces down to a size and shape that is wearable. Keep in mind, some kits come pre-trimmed. The one which I bought (ATA Works) does not. Trimming the plastic is not difficult at all as long as you work slowly and patiently. The tools I am using are a box cutter and some needle nosed pliers. Some people choose to use tin snips or other shears but I find this way easy enough. Pic of the tools:

To trim the pieces use the box cutter to score the plastic. In other words, outline the area you want to remove. It may be hard to see in this pic, but here is the first score mark on the shoulder bell piece:

After you have scored the plastic use the pliers to bend the plastic along the score. Soon enough the plastic will buckle and snap off along the score line. Here’s a pic of the bell with the piece removed:

Remember to leave a small overhang on the armor pieces in order to give the illusion of thickness. Here is a closeup of the overhang on the ab section of the armor:

Over the next few days I will be trimming out the rest of the armor. Keep checking back. I will post when I move on to the next step.

Armor Kit Arrived

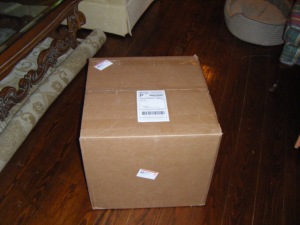
The armor kit arrived today. It is an ATA kit and I am very impressed with the quality.

Pic of the unopened box:

The helmet comes with a bag of bolts, nuts, washers, mic tips, rubber trim, and lens material. Pic of the helmet and accessories:

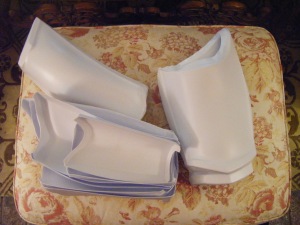
The kit comes with all the other necessary pieces including spare material to cut the finish strips from. Here is a pic of the other pieces in the kit:

One more pic of the stuff I couldn’t fit on the table:

Assembly will start ASAP. Check back soon. Thanks!

Painting the E-11

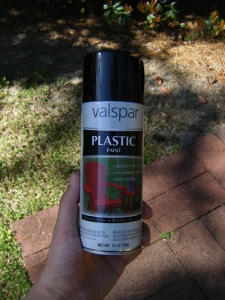
The final step in finishing the E-11 is applying the paint. Some people choose to do silver undercoats for weathering. I decided to simply do a flat black paint job. The paint I used is Valspar Plastic Paint. It bonds to plastics and casting resin so it was perfect for my needs. Here’s a pic of the spray can:

I used a hangar to hang the blaster outside while I painted. Pic of the gun before paint:

Apply the paint with wide, even strokes. Give 5-10 minutes between coats, and avoid handling the gun for 24 hours. Pic after the first coat:

Pic of the right side after second coat:

Second coat, left side:

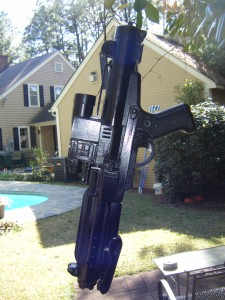
Overall it took about 3 coats, with extra attention to the little nooks and crannies all over the gun. Remember, when painting, less is more. You don’t want the paint to pool up and drip. Any drips you see may show up after the paint is dry. Here’s a pic of the finished blaster: