Ok, first of all I want to apologize for getting lazy on this blog. I haven’t updated in over a month and in that time I actually finished assembling my armor and attended my first troop (more on that to come later). So, since I got lazy I didn’t take as many pictures as I would have liked to. In place of some of the build pictures I took pictures of some pieces after they were finished so I will do my best to explain what was done.
Trimming is the biggest job of the whole build in my opinion. Since I have already posted on the techniques I used to trim I won’t go into that anymore. Once you have all the pieces trimmed, the next step is to glue all the pieces that need to be glued. Biceps, forearms, and thighs are done exactly the same so I’ll just explain one. Shins are done very similarly but with one difference which I will explain.
The following pictures are of the biceps but like I said the forearms and thighs are done exactly the same.
The two pieces are “clamshelled” together with a finishing strip on the outer side. The finishing strips are 15mm thick.
In order to cut the finishing strips I made two templates out of paper:

The 7mm template is for trimming either side of the bicep pieces to make sure the finishing strip fits evenly over the entire joint. This may have to be altered depending on the circumference of your arms. Here is a pic of two of the cut finishing strips:

Here is a pic of the inner joint:

And here is a pic of the whole bicep glued and clamped showing the finishing strip on the outer joint:

Now the shins are done the same way on the front side (“clamshelled” with a finishing strip on the outer joint). On the backside I simply have velcro to secure the seam which allows the shin piece to open and let the foot slip through. If both sides are glued it may be difficult to get your foot all the way through. Remember to put the hook side of the velcro facing away from your body to prevent any snagging on your undersuit.
The left shin, and right thigh have extra pieces on them. (sniper knee on the shin and ammo packs on the thigh) These pieces are attached on either side with a pop rivet.
Here is a pic of the left shin showing the rivet on the sniper knee:

And a pic of the right thigh showing the rivet:

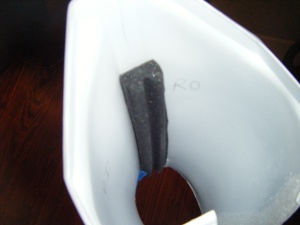
I also decided to add a piece of weather stripping on the inside of each shin piece. This foam keeps the thigh from moving around too much while walking and give it an overall better fit.
Here is a pic of the inside of the right shin showing the weather stripping:

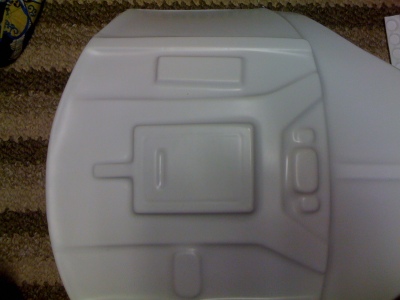
Another piece that needs to be glued is the thermal detonator control plate. The thermal detonator assembly is very straight forward. The body is a 2″ diameter conduit pipe. The plate is glued to the front and the two end caps are put on either end. My end caps were tight enough that I didn’t actually put any glue on those pieces. Here is a pic of the front of the thermal detonator:

The detonator is attached to the belt with two clips that hang over the top of the belt. For my clips I cut two strips of an old license plate and bent them to shape. There are better ways to do this such as using aluminum strips or money clips, however this was the easiest way for me and they don’t really show at all so I’m ok with it for now.
Here is a picture of the back of the detonator showing the clips:

The clips are attached to the detonator using four pop rivets. Line up the clips, drill holes through both the clips and the detonator body and then rivet. Simple as that.
Here is a pic showing the rivets:

The ab buttons on the ab piece need to be glued as well (sandtroopers don’t need these pieces so they aren’t molded into the ab piece).
Here is a picture of the ab piece without the ab buttons glued:

And a picture of the ab buttons glued. (note the four left ab buttons are not glued in this picture):

Here is a picture of the ab buttons painted. (Note the belt is attached in this picture):

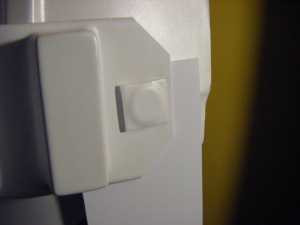
The belt is attached with a single bolt on both the left and right sides and the covered with the square button covers that are included in the kit. To fasten the belt around the body I cut two 3″ thick pieces of plastic and attached them at the same bolt. The plastic is flexible enough to wrap around the body and secure in the back with velcro.
Here is a pic showing the point at which the belt is attached:

Once it’s all finished you should have something like this:

Stay tuned, more posts to come this weekend :)


